WordPress is a great tool for designing, setting up and maintaining business websites. InfinCE App Marketplace offers WordPress Portal, a private installation of WordPress, for you to securely manage your website. Let’s take a look at the steps involved:
Purchase WordPress Portal
Go over to Administration > Applications > All Applications tab. Click on “MORE INFO” for “Wordpress Portal” to know more about the features and benefits of WordPress.
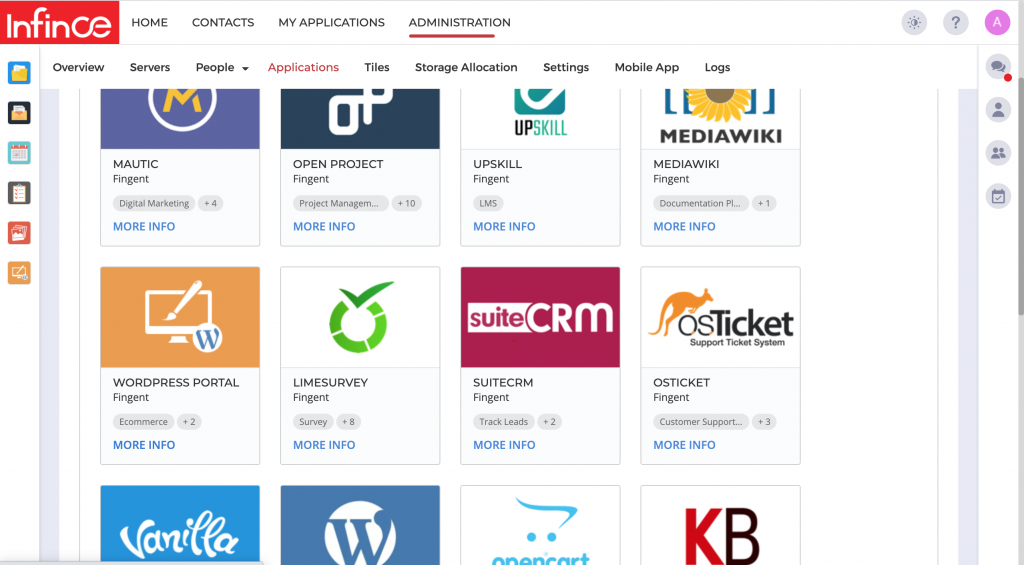
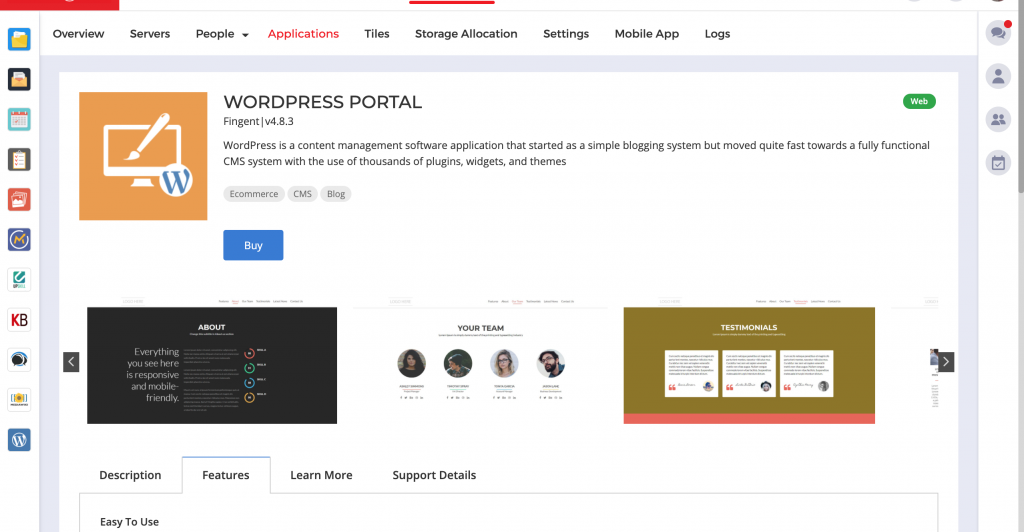
Click on “Buy” when you are ready to proceed. Then choose a Server that meets your requirements.
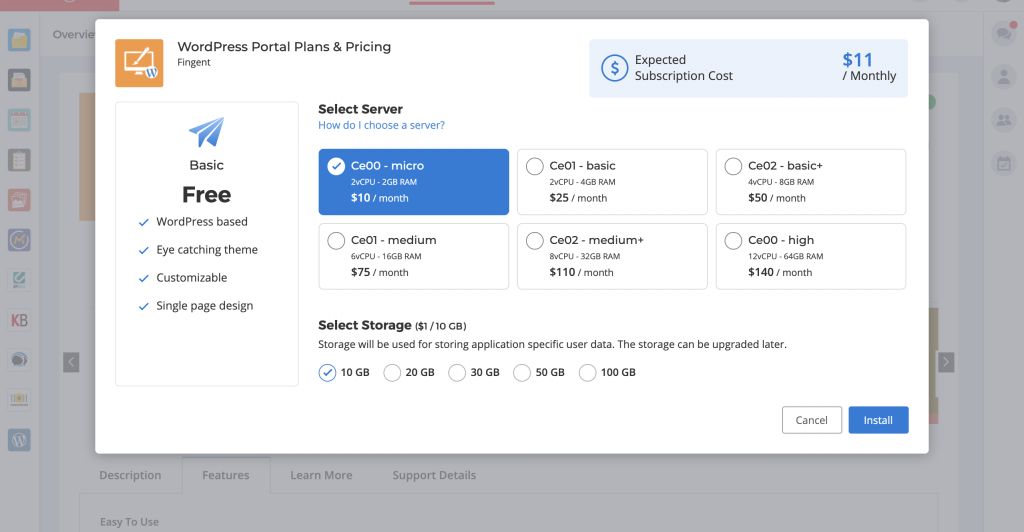
For a typical business website you could go with the ‘Ce-01 micro’ or ‘Ce-01 basic’ servers. Select Storage based on the amount of data you would need to store/capture. Both server and storage can be upgraded in future, as and when your requirements grow. Once the choice is made, you would see the monthly cost for hosting the WordPress site, which would start appearing in your monthly billing from the next month.
Once the installation is complete, you can see the WordPress Server up and running under Administration> Servers tab. You can also see “Wordpress Portal” on your left menu bar, and listed under Administration > Applications > Installed Applications tab.

Provision your Content Management team
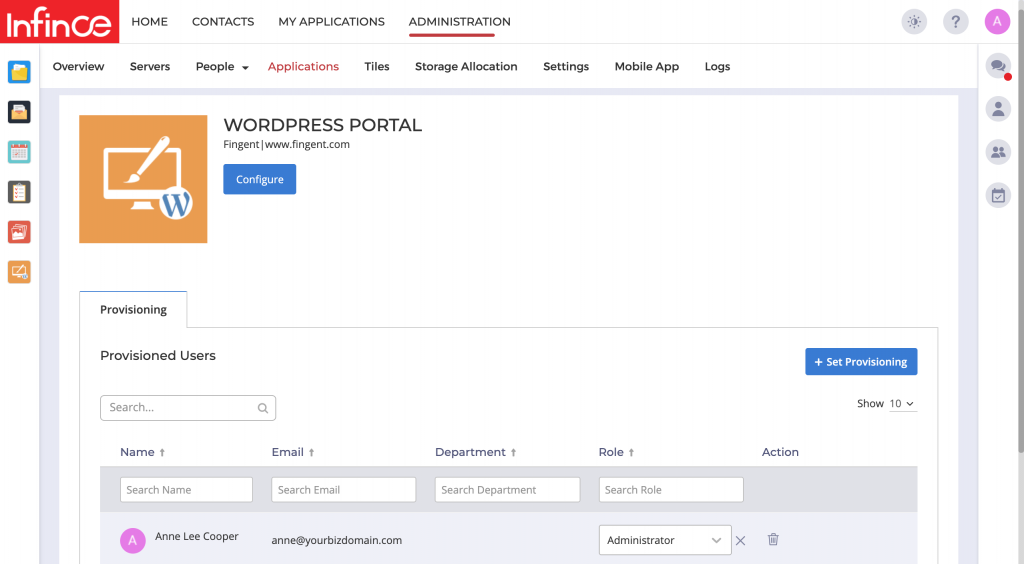
Next, you need to provision access to your Content Management and Design teams to enable them to set up the website content and design. To do this, click on the “MANAGE” link on “Wordpress Portal” under Administration > Applications > Installed Applications tab. (If you do not have an in house team for the website creation, contact us and our creative team can help you out).
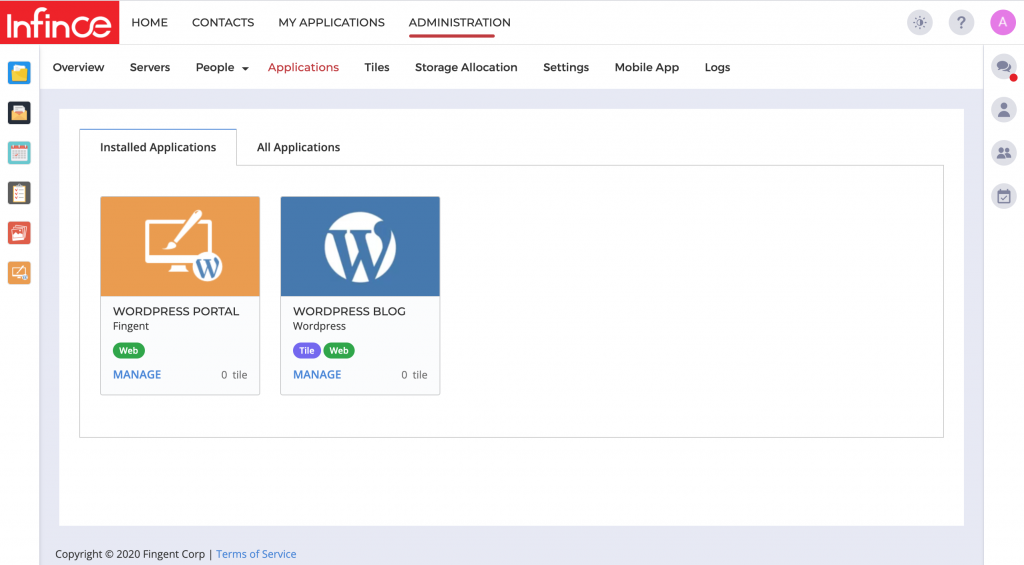
Click on “Set Provisioning” to select desired users, choose their roles and grant access.

Set up your Website
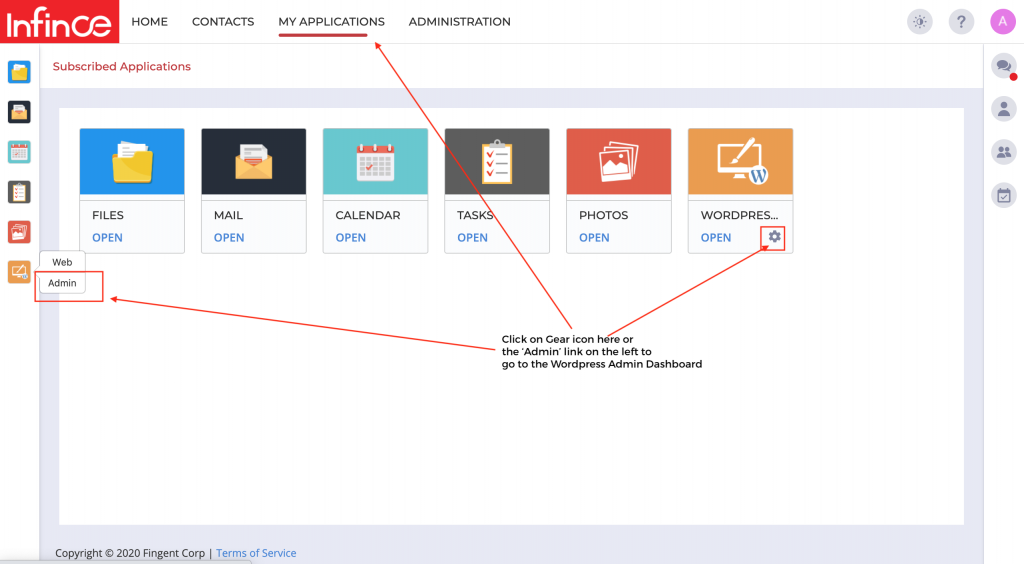
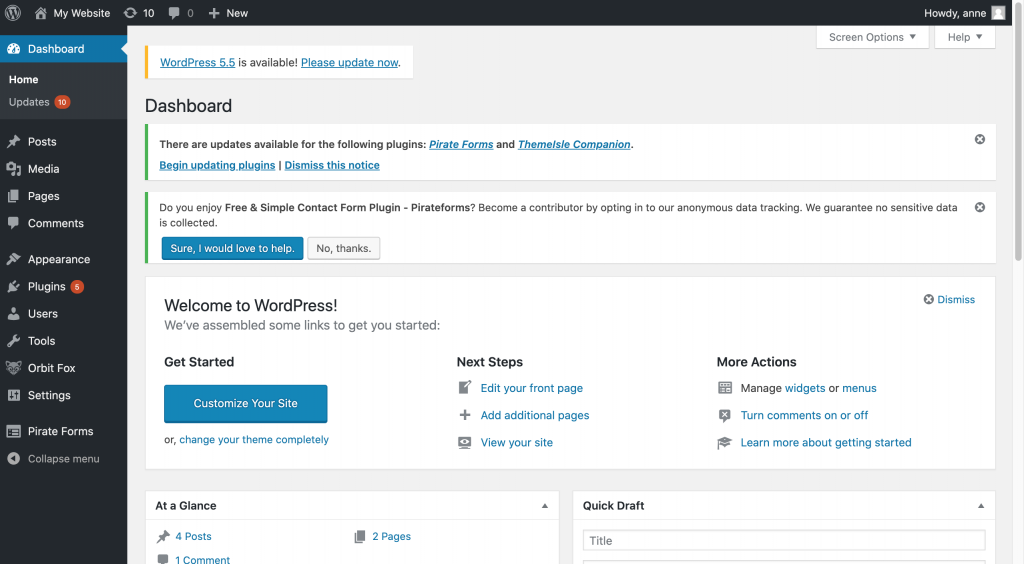
The Design/Content Management team members who have access to WordPress Portal can now start working on the website. They can click on the WordPress Portal icon on the left menu bar and choose “Admin”, or click on the Gear icon within “Wordpress Portal” from the “My Applications” page to access the WordPress Administration Dashboard.
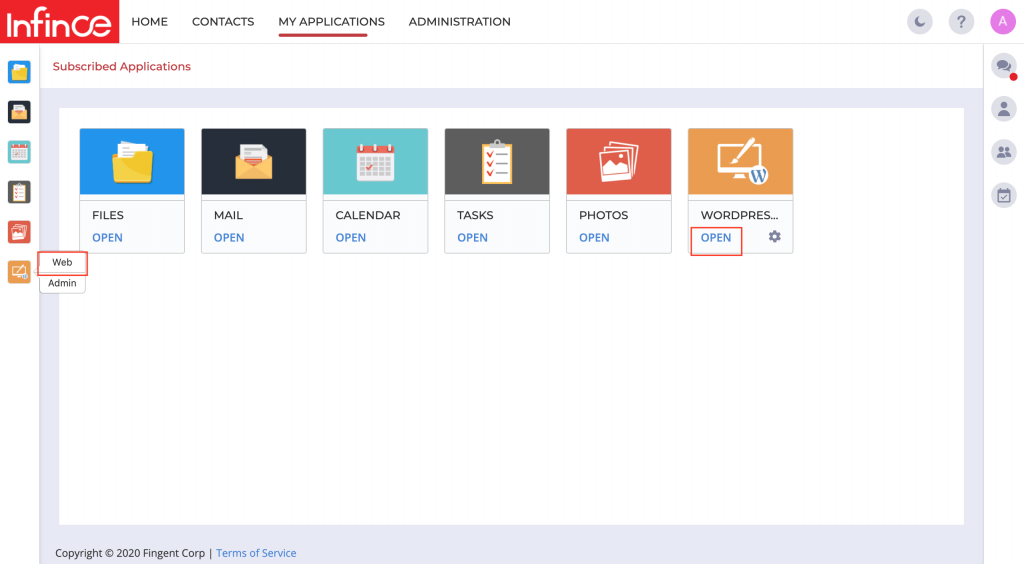
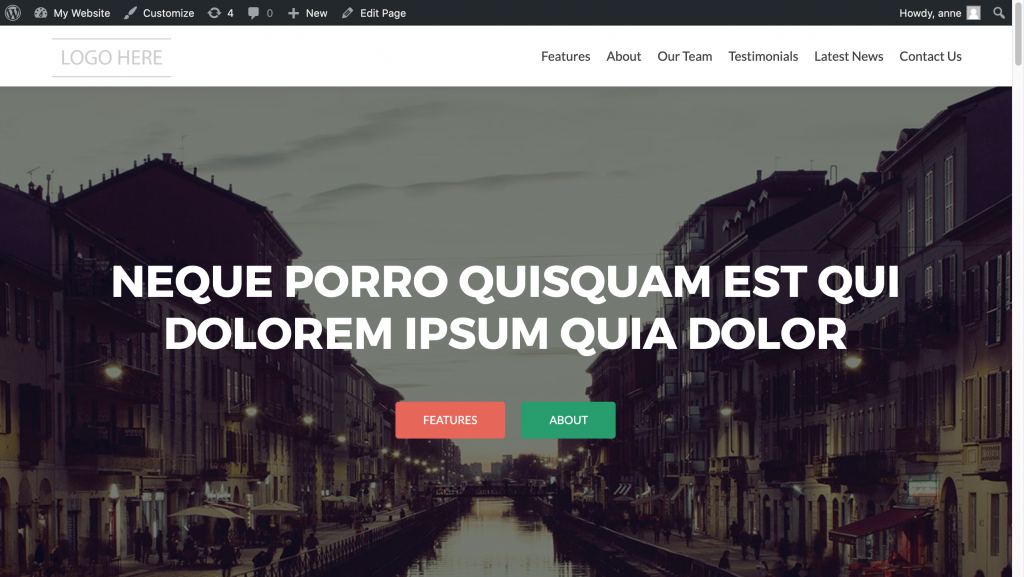
A default theme and content would be available for you to start with. To view this default page or review the page while under construction, click on the WordPress Portal icon on the left menu bar and choose “Web”, or click on “OPEN” within the “Wordpress Portal” card on the “My Applications” page.
Your team is now set to do all the content and design work for getting your website ready! Use the Help articles within WordPress for any help along the way.
Map your business domain to your WordPress website
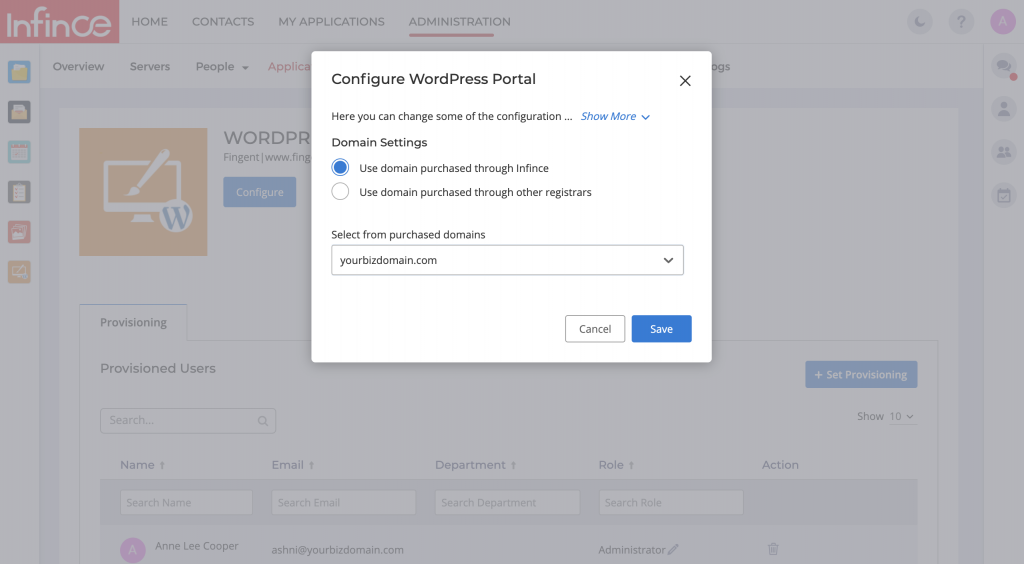
Once your website is ready to be published, you can map your WordPress site to your business domain. To do this, go to Administration > Applications > Installed Applications and click on ‘MANAGE’ within the WordPress Portal card. Then click on the ‘Configure’ button to link your site to your domain.
If you had registered or bought your business domain via InfinCE, choose the “Use domain purchased through InfinCE” option, and select the domain below.
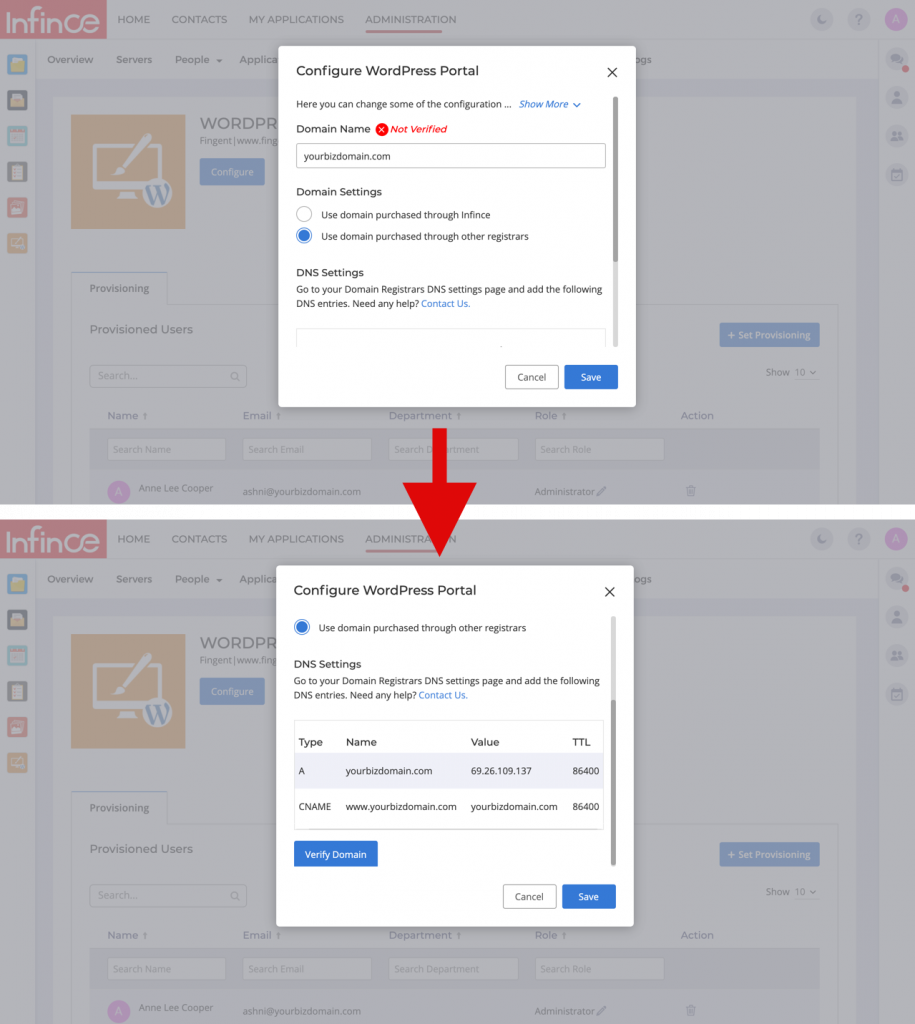
On the other hand, if you had registered or bought your domain outside InfinCE, provide the domain name and choose the “Use domain purchased through other registrars” option. In the DNS Settings section, you would see 2 DNS entry details which need to be added in your DNS Registrar’s DNS Settings page. Once those entries are added, click on “Verify Domain” to successfully map your WordPress website to your business domain.
You are now all set to showcase your brand new website to the world!
If you face any challenges at any of these steps above, please feel free to contact us. Our technical team would be happy to guide you through.